Craft Show Display Stands

I recently did two shows in Memphis. And I researched how to display my art for weeks. I looked everywhere for the best type of displays to use. I ended up finding this one on Pinterest:

Speed Bump: DIY: Freestanding Display For Craft Shows

I didn’t want the pegboard, so I made my own version of it, and this is what it ended up looking like:

stands

I used 4x1s and 1x1s, one right next to each other. My first version of this was to use just the 1x1s but I didn’t like how that looked, too much of what was behind the stands was coming through.

I bought the crates from Michaels and used them for transporting my art as well as display items. for the larger paintings, I used d-hooks on the back and then hung them with s-hooks onto the wood display. The s hooks I used were like these:shooks

The end result looked like this. I will look for different hooks next time since the s-hooks made the paintings hang oddly on the wood. I had originally thought I would hang the paintings from string attached to the tops of the wood but I didn’t like how it looked. The s-hooks allowed me to reconfigure and move things around throughout the day which I needed to do.

display (2)


That makes five

IMG_1458

This is what my kitchen table looks like right now.  Working on a custom burlap sign, and making a bunch more burlap letters.  The custom sign I am working on is sale number four for this month, and sale number five was the next day.  For me and my little etsy show (www.etsy.com/shop/dlynnart), that’s a lot.  And what’s amazing is that views and clicks are down for my shop, sales are up.  Interesting phenomena.

Etsy Shop Marketing

Etsy Shop Marketing

Sold two of these signs in the past week! Pretty amazing.

So is it working? Here’s what I am doing for marketing:

1. Facebook and twitter updates – I have hired someone to post frequent updates, host contests, etc.
2. Posting my items (and other people’s) to pinterest
3. Etsy ads for my burlap signs section

And the winner is… Etsy ads. Two sales directly attributed to etsy ads. I am shocked as this didn’t seem to have any impact before. But, two signs in a week, that’s pretty cool, and seems to be working!!

Making a Textured Painting

I didn’t want to call this a How To since there are so many ways I have already learned to use texture with my paintings.  This one is a little bit new, and it’s an adaptation of something I read somewhere, someone else’s how to.

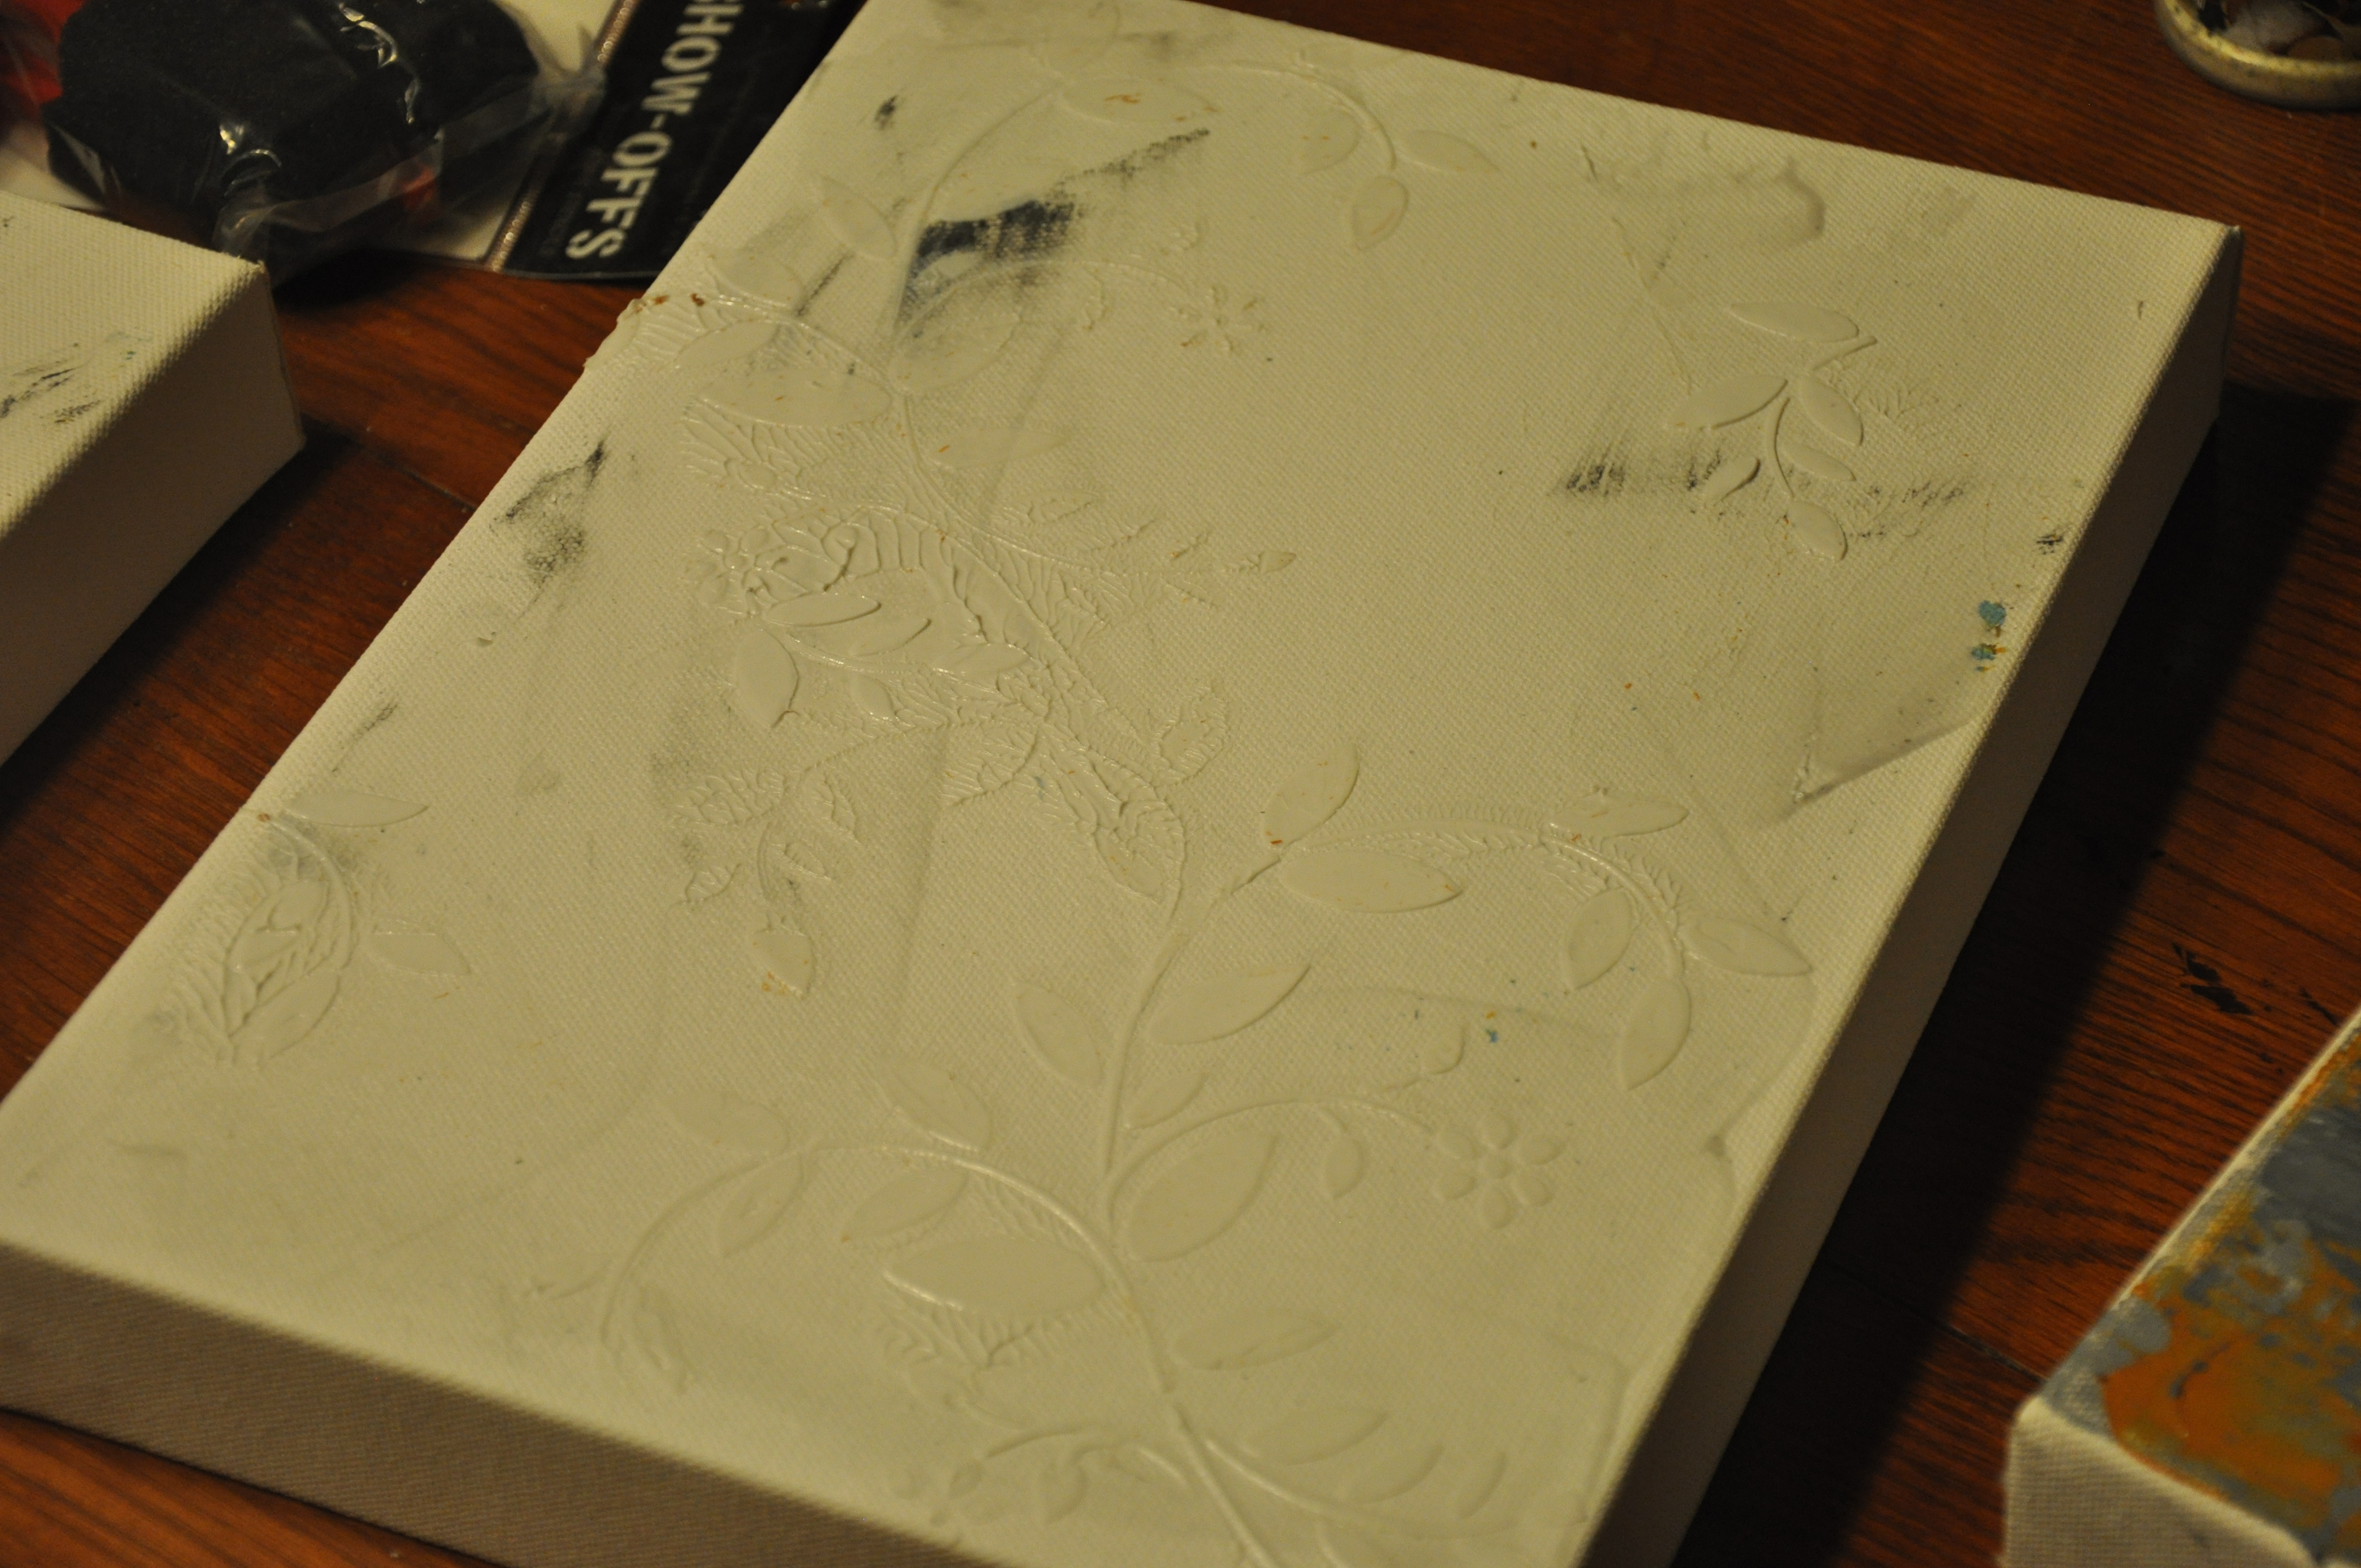
I started this one with an 8×10 canvas.  Applied a coat of gesso, using my new favorite palette knife, a long flat one.  After letting the gesso dry, I used modeling paste and applied a couple of patterns to the canvas.

Image

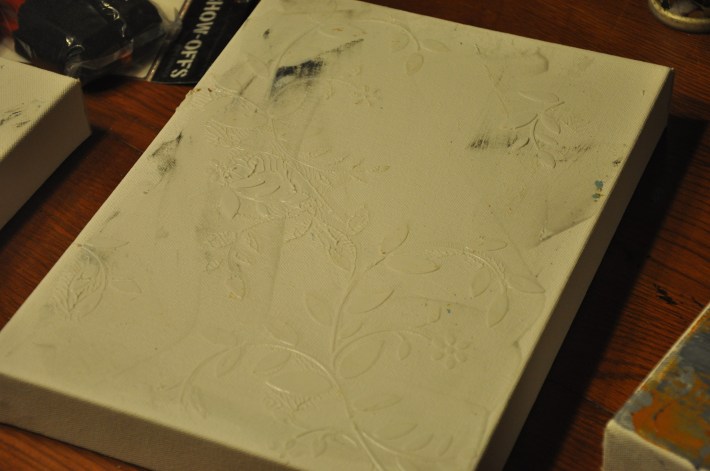
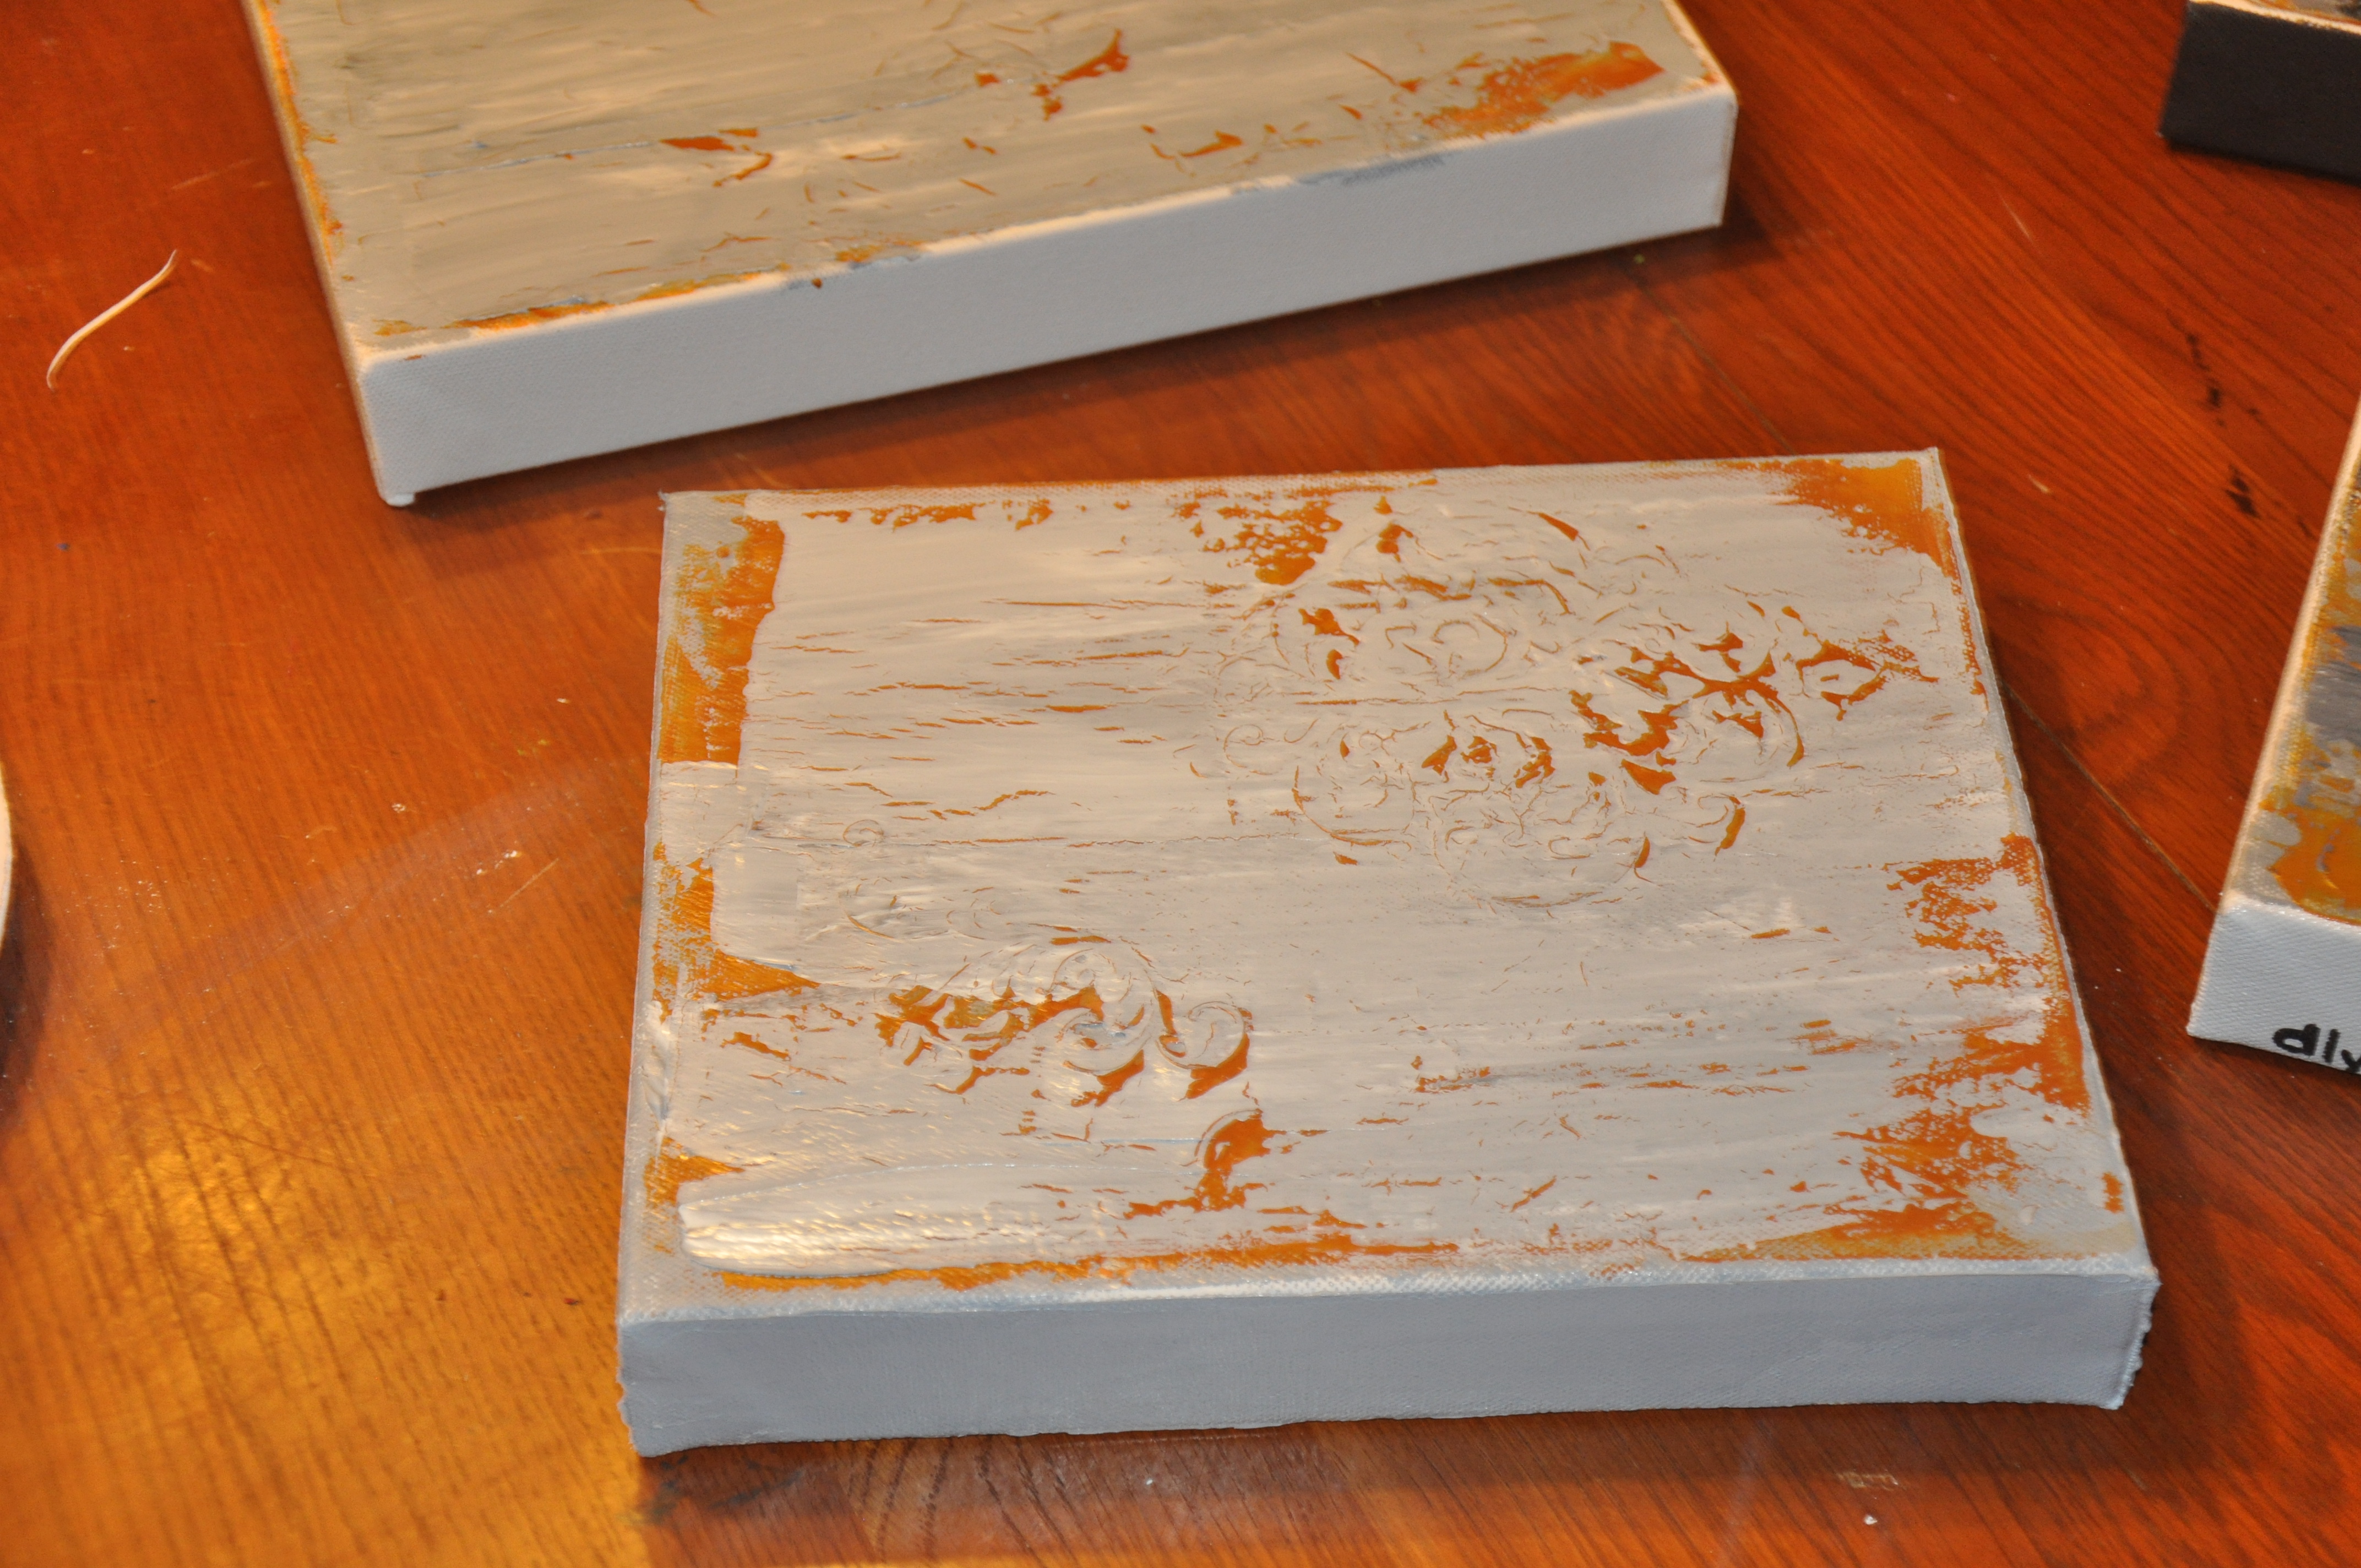
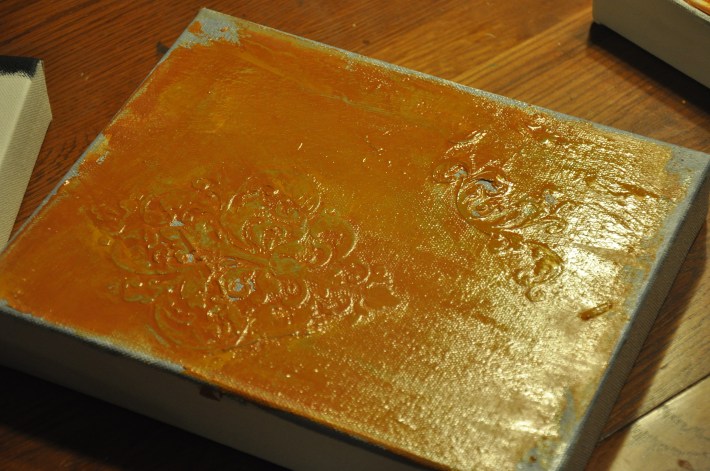
This one had to dry overnight.  Seemed like the modeling paste needed loads more time to dry compared to other textures.  I picked orange and gray as my main colors, so I painted my first layer as gray, covering the stenciled areas as well as the sides and all surfaces.  Then I painted a layer of a combination of raw sienna and yellow oxide which made an dark yellow/orange color.  I used my palette knife for this color which meant that the crevices on the stenciled areas did not always get any of this color.

Image

The next layer I used was a crackling solution.  It is meant for latex paint, but I figured I would give it a try, and it seemed to work out.  I left this one to dry for about two hours, and it looked super shiny, but after two hours or so, it was not wet.

Image

Applying the coat on top of the crackle is the hard part.  You have to do this in one move or it will mess the crackling effect up.  I mixed my gray paint, making sure I had enough of it, then used my palette knife to spread it over the entire surface.  I made sure to not go back over any of it, and applied it as thick as it came out.  I let this sit overnight before doing anything else with it.

Image

At this point, I considered my canvas nearly perfect.  The next step was to apply an image on top of the background I had created.  I chose a fleur de lis. I used a stencil (you can buy plastic and make your own or buy pre-made stencils), put it in the spot I wanted, then applied modeling paste making sure to only get the paste in the open area of the stencil.  I didn’t mix any paint in with the modeling paste, but if i had to do it over again, I would have.  Once the modeling paste dried (let it dry overnight), I painted it with a smaller palette knife and applied different thicknesses to it.  Once that dried, I sprayed a coat of glossy varnish and let it dry.

The finished product (which I love):

Image

This painting is currently listed for sale in my etsy shop (Acrylic Paintings):

dlynnart.etsy.com

Social Media Part 1

I am now posting on facebook and twitter.  Easily 20 times more than I used to.  Or even 100 times more.

I have to admit, it’s not always me.  Is that wrong?  I hope not, because I love what I’m seeing.  There’s so much great interaction going on, and the give away was so much fun!  I would have never done that give away on my own, and I had an absolute blast doing it, and can’t wait to do more.

I am a little awkward when it comes to posting.  I’m kind of phobic, I’m afraid nobody will respond or there won’t be any clicks or the interaction won’t be there.  But if someone else is doing it, it lets me sit back a little and watch what works and doesn’t work.  So, this is easier for me.

So I’m getting help, and also doing some on my own.  Here’s what I’ve learned so far:

  • It’s ok if nobody comments or responds to a tweet or post.
  • It’s ok to get help (isn’t it?)
  • Be positive in your posting
  • Watch what time of day you get the best interaction
  • Don’t post the products you are selling too much.  Make sure you’re interaction is more than just selling.
  • Share information about yourself.
  • Give aways are fun!  Like my facebook page (www.facebook.com/dlynnart) or follow me on twitter (@dlynnart) to see what the next one is

This is all so far, but I expect to learn much more, so stay tuned…

St Jude Fundraising 2012

With 2012 in the history books, it’s time to evaluate how my year in art went. I started selling my art to benefit St Jude in April of 2011. To date, I’ve raised over $5,000! The day I decided to sell my art and donate the proceeds to St Jude was enlightening. In one day, I figured out how to do something I truly enjoy while realizing another goal of mine, supporting a worthy cause.

So, 2012 is over. How did the year go? I had two big sales events for the year, the Fall Fest at St Francis, and the MEMShop holiday pop up event with ISM. I nearly achieved my goal of $2500 for the year between those two events alone. On top of those two sales events, I had a large custom order for a wedding earlier in the year. Slow but steady orders throughout the year got me to a total of about $2800. This is a little more than last year, but that was my goal. I would love to keep the trend of more raised year over year, we’ll see how this year goes.

What have I learned this year?

  • There are items that I would love to make that take too much time, and don’t have enough profit. I keep trying with the picture frames. But they are my lowest profit item, and I didn’t sell that many this year. I’m not sure I’ll keep making them
  • I should keep making the things that I like. It is so much easier when it doesn’t feel like work.
  • I may not be charging enough for my work.  I keep making things, and I kind of want them gone as soon as I’m done, so I price them fairly low.  This may be working against me.
  • Everything doesn’t have to be perfect. That was a shocking moment for me when I made something that didn’t have straight lines, and had other imperfections. This was the painting that changed my view on imperfection:

DSC_0012

What happens in 2013?

  • I WILL improve my time for the half marathon this year. I plan to lose a bunch of weight so I can walk/run it.  And I’ll raise more money this year than last.
  • I may change things up a bit and split my profits between multiple worthy causes.
  • Bigger paintings!
  • Making the jewelry / mirror wall hangings that keep haunting me.  And charging the right price for them.
  • Social marketing (including this blog) to expand my fan base

Let’s see how things go…

How to Make a Burlap Sign

One of my biggest sellers previously was burlap signs and letters. I don’t make them any more, but that’s all part of the evolution. 🙂

Here’s how I make them (revised):

Making the burlap part:

  1. Start by printing out what you word or letter you want in font you want it in. Note that when you create something in MS Word, you can change the font beyond the options that are available. Like you can manually type in 200 as the font even if it’s not in the list.
  2. Once printed, if it’s really large, you may have to tape the pages together. Note that you can’t go too big with the fonts or you end up with a puzzle in the end and it could be unusable.
  3. Trace the outline of your word or letter with a Sharpie marker.
  4. Iron a piece of burlap that will cover the outline you have created and cut it if necessary so there is plenty of room around your word or letter. Leave some room so you can trim it if needed. Note that if you cut too close to the letter or word, you won’t have any room for error.
  5. Place the outlined paper underneath your ironed burlap.
  6. Trace the outlined word or letter (that you can see through the burlap) with your Sharpie marker. Once complete, you should end up with an outlined word or letter on your burlap.
  7. Leave the paper underneath the burlap and paint inside the outlines using black  acrylic paint. Cover the outlines. Move the painted burlap to a cardboard box or some other surface after painting, but before it’s completely dry, otherwise it will stick to the burlap and you’ll have paper bits on the bottom.
  8.  Set aside.

Preparing the wood:

  1. Using the measurement you’ve determined, cut your wood.  You can buy wood at Home Depot or Lowe’s and ask them to cut it for you if you already know what size you want.
  2. Sand the wood to remove all jagged edges left from cutting.  I use an electric disk sander and usually spend the most time sanding the ends.
  3. Paint the sanded wood with regular paint using the color of your choice.  I typically use two coats of paint.
  4. Sand the painted wood to distress it.  I sand some areas down to the wood to give it a distressed look.
  5. Seal your wood with varnish.  I use a spray varnish.  I know its cheating a bit, but it is easier to clean up for me.

Putting it all together:

  1. Place your burlap on top of your finished wood.  Center your word on the wood and trim around the edges.
  2. If a fringed look is desired, pull some of the threads off of the burlap.
  3. Spray the back of the burlap with spray glue.  Don’t use too much, just enough so that it sticks to the wood.  For smaller signs, this step may not be required, but I eventually started doing this for every size.  On bigger signs, the burlap starts to sag a bit away from the wood.
  4. Using upholstery nails, nail the burlap to the wood.  If you make a mistake in placing the nail, use a knife or something else to pull it back up and re-position it.  Make sure to pull the burlap evenly when placing the nails to avoid any buckling of the burlap.
  5. Once nails are in, use a spray varnish to seal the paint to the burlap and the burlap to the wood.
  6. Nail in a sawtooth hanger to ready your sign for hanging and you’re done!


Read on only if you want to see how much I learned over time…

This is my old method (I stopped using it somewhere along the way as the cutting was just a pain in the butt):

  • Start with paper, pen and a stencil.  I like to use letters that are about 3 1/2 inches tall.  The size of the letter matters as it dictates the size of the wood required.
  • Draw a line on the paper with a pen.
  • Stencil your letters using the line as a guide.  Remember to evenly space the letters.
  • Use an exacto knife to cut out the letters.  I have a cutting board that I use beneath the paper.
  • Measure the template you have created to determine the size of wood required.  I like to leave at least one inch on either side, maybe two.  If my template is 12 inches, I will use a 14 – 16 inch piece of wood.
  • Cut out a piece of burlap that will leave an inch all the way around your word or words.  If my template is 12 inches wide and 3 1/2 inches tall, my piece of burlap will be 14 inches by 5 1/2 inches.
  • Iron the burlap.
  • Take the template and place it on top of the burlap and paint over it.  I use acrylic paint, I couldn’t get the spray paint to work without it leaking onto the rest of the burlap.  Don’t put too much paint on at once as it may leak around your template.  I put just enough to show me where the letters are.
  • Take the template off and touch all of the letters up.  If you have painted just enough, for the outline, you’ll need go over each letter.
  • Set aside